How to Fix an Overwatered Plant Without Killing It
If you’ve overwatered your plant, stop watering it right away and remove any standing water from trays to ease root stress. Check and clear drainage holes, then add gravel or perlite to your soil mix for better flow. If roots are mushy, trim the damaged parts with sterilized shears and repot in fresh mix. Boost air circulation with a fan to speed recovery. Following these steps will lead you to effective long-term strategies for thriving plants.
Key Takeaways
- Stop watering the plant immediately to prevent further root damage.
- Remove standing water and clear any clogged drainage holes.
- Repot the plant with fresh, well-draining soil after trimming rotten roots.
- Improve air circulation around the plant to promote moisture evaporation.
- Monitor soil moisture daily and only water when it has dried out.
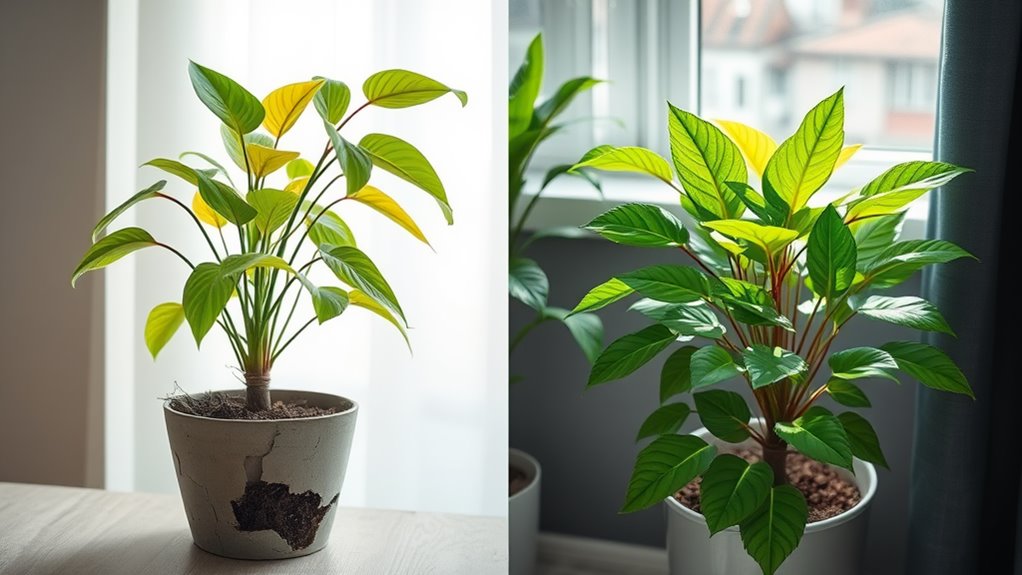
Signs of Overwatering
Overwatering your plant can quickly lead to visible signs that demand immediate action and Implementing effective recovery techniques can help restore the plant’s health.
You’ll spot yellowing leaves first, a clear indicator of root suffocation from excess moisture, hindering watering recovery.
Wilting persists despite wet soil, as roots rot and can’t absorb nutrients effectively.
Mushy stems signal tissue breakdown, while mold or fungus on the surface shows poor aeration.
Stunted growth emerges as the plant struggles with waterlogged conditions, emphasizing the need for early detection to support overall watering recovery without further damage.
Watch closely for these detailed cues to assess your plant’s health accurately.
To foster thriving plants, focus on achieving the right watering balance.
Immediate Actions to Take
As soon as you spot the signs of overwatering, stop watering the plant immediately to prevent further root damage.
Next, remove standing water from saucers or trays to halt saturation. Improve drainage by checking for clogged pot holes and clearing them if needed.
Boost air circulation by moving the plant to a breezy spot or using a low-speed fan to evaporate excess moisture.
Gently probe the soil with your finger; if it’s soggy, allow it to dry naturally. For instance, in extreme heat, it’s crucial to monitor soil moisture more frequently to avoid complications.
Monitor daily for signs of recovery, like firmer leaves, to ensure you’re on track without escalating issues.
Additionally, to prevent future issues, incorporate expert watering techniques for better plant hydration.
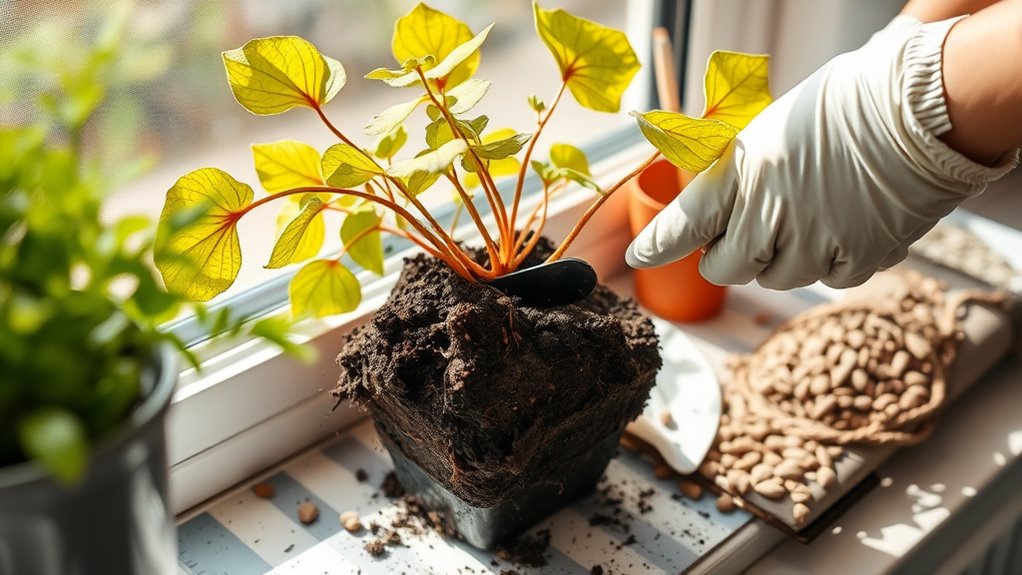
Repotting Your Plant
If your plant’s roots show signs of rot or the soil won’t dry out, you’ll need to repot it promptly to restore healthy drainage.
First, gently remove the plant by inverting the pot and easing it out, taking care not to damage stems.
Inspect roots closely: trim rotten sections with sterilized pruning shears, cutting back to healthy tissue.
Select a clean pot of appropriate size, then fill it partially with fresh, high-quality potting mix.
Position the plant at its original depth, backfill with mix, and firm the soil lightly.
Monitor for recovery over the next few days.
To support long-term plant health, incorporate soil preparation strategies from basic gardening tips.
For optimal results, ensure the new potting mix is prepared using universal soil prep methods to promote healthy root growth.
Enhancing Drainage
To enhance drainage in your overwatered plant, start by adding a drainage layer of gravel or pebbles at the pot’s base to prevent water accumulation.
This technique allows excess moisture to exit freely, reducing root rot risks.
Next, improve your soil mix by incorporating perlite or sand, ensuring it drains efficiently while retaining necessary nutrients. However, for optimal results, it’s wise to explore store-bought soil mixes as alternatives that may lack proper drainage and nutrient balance.
Additionally, incorporate backyard solutions like leaves or organic matter from your yard to naturally boost soil structure and fertility.
Add Drainage Layer
Adding a drainage layer to your plant’s pot helps prevent water from pooling at the roots, which can exacerbate overwatering issues.
You’ll need materials like gravel, pebbles, or perlite—choose ones that won’t decompose. Start by placing a 1-2 inch layer at the pot’s base before repotting. This creates airspace for excess water to escape, reducing root rot risk.
Ensure the layer doesn’t block drainage holes; secure them if necessary. Test by pouring water through—it should flow freely.
This simple step enhances aeration and promotes healthier root environments without altering the soil itself.
Improve Soil Mix
After adding a drainage layer, you’ll improve your plant’s soil mix by incorporating materials that boost drainage and aeration. These amendments prevent waterlogging and enhance root oxygen access. Start by mixing in perlite or coarse sand to your existing soil for better structure.
| Material | Benefits | Recommended Ratio |
|---|---|---|
| Perlite | Enhances drainage and aeration | 1:4 with soil |
| Vermiculite | Retains moisture without excess | 1:3 mix |
| Coarse Sand | Improves water percolation | Up to 30% |
| Pumice | Provides lightweight support | 1:5 ratio |
| Bark Chips | Prevents compaction and drains | 10-20% blend |
Test your new mix by watering; it should drain quickly, ensuring plant recovery.
Trimming Affected Areas
When you notice yellowed leaves or mushy stems from overwatering, use sharp, sterilized pruning shears to carefully remove the affected parts, as this helps prevent rot from spreading and allows the plant to redirect energy toward healthier growth.
Start by identifying damaged areas—cut just above the node or at the base for clean removal, minimizing stress.
Sterilize shears between cuts with alcohol to avoid introducing pathogens. Dispose of clippings immediately to prevent contamination.
Always make precise, angled cuts to promote healing and reduce moisture retention, ensuring your plant recovers efficiently.
By applying these pruning methods, you can achieve results similar to the 50% increase in yield demonstrated in tomato plants through effective techniques.
To further enhance your plant’s vitality, incorporate essential pruning techniques that significantly boost garden growth rates.
Adjusting Environmental Conditions
You need to adjust your plant’s environment by increasing airflow and regulating temperature to combat overwatering effects.
Increasing airflow helps circulate air around the roots, reducing humidity and preventing fungal growth.
Regulating temperature keeps it between 65-75°F to support recovery without adding stress.
Increase Airflow
Increasing airflow around an overwatered plant promotes faster evaporation of excess moisture, reducing the risk of root rot.
You’ll enhance drying by circulating air effectively, which prevents stagnant conditions that favor pathogens. This technique dries soil surfaces quickly while minimizing stress on roots.
To implement this practically:
-
Position a fan: Set up an oscillating fan on low speed to gently move air around the plant, ensuring even evaporation without causing leaf damage.
-
Open vents: Crack windows or use exhaust fans to introduce fresh air, maintaining a steady flow that accelerates moisture loss.
-
Relocate the plant: Move it to a less enclosed area, like near a doorway, to benefit from natural breezes and improve overall ventilation.
-
Prune foliage: Trim dense leaves or stems to reduce obstruction, allowing air to reach inner parts and promote uniform drying.
Regulate Temperature
Regulating temperature effectively speeds up evaporation in overwatered plants, minimizing root stress and fungal growth.
You should target 65-75°F (18-24°C) for most species, as this range enhances transpiration without causing heat damage. For tropical plants, aim slightly higher at 75-80°F to optimize drying.
Move your plant away from cold drafts or use a heat mat for gentle warming, while monitoring with a digital thermometer to avoid extremes that could wilt leaves or shock roots.
Check temperatures daily, adjusting your environment to ensure even soil drying and swift recovery, promoting overall plant health.
Tracking Plant Recovery
While tracking your plant’s recovery, you’ll observe key signs like new leaf growth and firmer stems to confirm improvement.
Keep a daily log to track subtle changes and adjust care precisely.
-
Measure soil moisture twice daily with a digital meter, aiming for the ideal range to prevent relapse.
-
Inspect leaves for color vibrancy, new growth, and texture changes, noting any fading yellowing or spots.
-
Evaluate stems for firmness and elasticity by gentle pressure, watching for increased rigidity over time.
-
Monitor overall vitality by observing posture, root health if repotted, and response to light, ensuring balanced conditions.
To avoid common gardening mistakes, always double-check your watering habits as outlined in basic gardening guidelines.
Continue these practices until full recovery is evident.
For long-term plant health, incorporate successful growth strategies from beginner gardening essentials.