Why Your Herbs Keep Dying (And What I Did Differently)
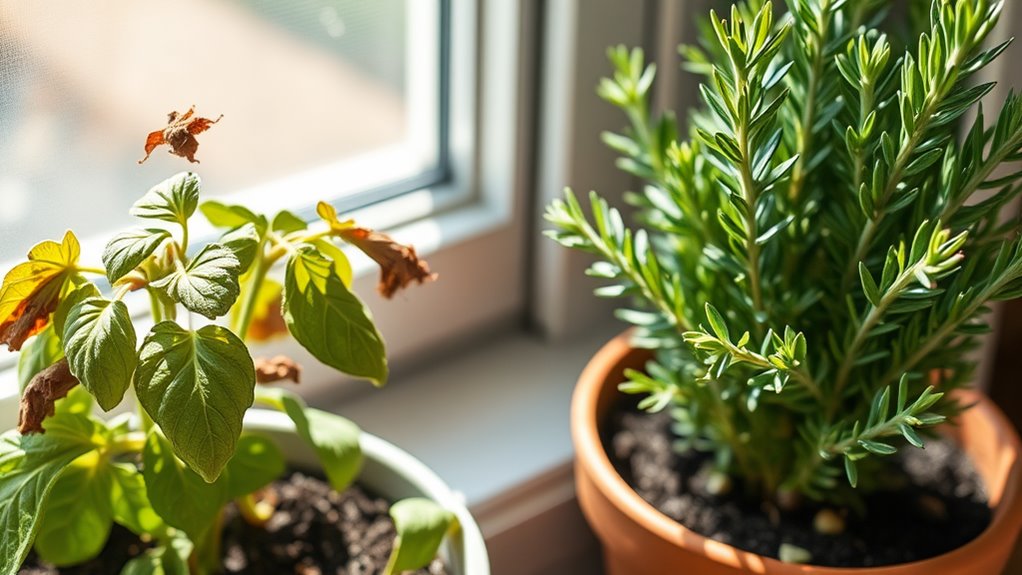
If your herbs keep dying, it’s likely because you’re overwatering them, causing root rot, or placing them in low light, leading to weak stems. Maybe you’re skipping soil checks or ignoring pests like aphids, which can quickly take over. I turned things around by checking soil daily, positioning pots in bright, south-facing spots, and rotating them weekly for even growth. Stick with these tweaks, and you’ll uncover more ways to keep your herbs thriving effortlessly.
Key Takeaways
- Overwatering often causes root rot in herbs; I now check soil moisture daily and use pots with good drainage.
- Insufficient light leads to weak stems; I positioned herbs in a south-facing window and rotate them weekly for even exposure.
- Pests like aphids can quickly kill plants; I inspect leaves regularly and apply natural treatments like neem oil.
- Poor soil quality causes stunted growth; I switched to well-draining soil to prevent moisture retention issues.
- Skipping pruning results in leggy herbs; I prune regularly to promote bushier growth and reduce disease risk.
Common Mistakes in Herb Care
If you’re struggling to keep your herbs alive, it’s often because simple mistakes in care throw them off balance.
One common herb care mistake is placing plants in low-light spots, causing weak stems and yellow leaves. You might also choose the wrong soil, like heavy clay that retains too much moisture, leading to root rot.
Overcrowding pots restricts air flow and invites pests, while skipping regular pruning lets herbs become leggy and unproductive.
Don’t forget to monitor for diseases early; quick action prevents spread.
By using a simple indoor herb growing setup, you can ensure a steady supply of fresh herbs year-round.
To turn things around, consider applying actionable changes from personal experiences to foster successful herb growth.
The Role of Watering in Herb Health
You’ve got to master watering if you want your herbs to thrive, as it’s a key factor in their overall health. Implementing a DIY watering system can help streamline your routine and promote consistent moisture levels.
Overwatering creates dangers like root rot that suffocate your plants and invite pests.
Underwatering, however, brings effects such as dry, brittle leaves that signal your herbs are starving for moisture.
Recognizing signs of overwatering early can help you adjust your watering habits for healthier herbs.
Overwatering Dangers
When you overwater your herbs, you’re drowning their roots and inviting problems like root rot, which can quickly turn a thriving plant into a wilted mess. This suffocates roots, blocking oxygen and fostering fungal growth that spreads rapidly.
You’ll notice yellowing leaves, mushy stems, and a musty soil odor as early warnings. To prevent this, always check soil moisture with your finger—if it’s damp, skip watering.
Use pots with drainage holes and well-draining soil mixes to avoid waterlogged conditions. By monitoring habits closely, you protect your herbs from these avoidable pitfalls and promote healthier growth.
Underwatering Effects
While overwatering suffocates herb roots, underwatering starves them of vital moisture, leading to wilted leaves, stunted growth, and brittle stems that signal dehydration.
This dries out your herbs’ cells, hindering nutrient absorption and making them more vulnerable to pests.
To spot and fix underwatering quickly:
- Check soil daily; if the top inch feels dry, water immediately to revive your plants.
- Look for curled leaves or slowed growth as warning signs you’re neglecting hydration needs.
- Establish a tailored schedule, watering based on herb type and weather to prevent future stress.
You’ll keep your herbs lively with these simple steps.
Finding the Right Light for Your Herbs
You need to understand the different types of light, like direct sunlight or indirect glow, to match your herbs’ specific needs.
Knowing the ideal light levels—such as 6-8 hours of bright light for basil—ensures your plants grow strong without getting scorched.
Once you’re aware of these, you’ll easily adjust light exposure by moving pots closer to or farther from windows based on the season. Beyond light, maintaining proper soil quality can further support robust herb development.
Additionally, many flavorful herbs thrive in containers, making it easier to manage their light requirements in small spaces.
Types of Light
Different types of light, from direct sunlight to artificial LED grow lights, play a crucial role in your herbs’ health and growth. You need to understand these options to match your space.
Direct sunlight offers intense, natural rays that herbs like basil thrive on, while indirect light suits shade-tolerant varieties. For indoor setups, artificial lights provide consistent spectra.
To choose effectively:
-
Assess direct sunlight: Place herbs near south-facing windows for full exposure, but watch for burns.
-
Explore indirect light: Use north-facing spots or sheer curtains for diffused rays without harshness.
-
Incorporate artificial lights: Opt for LED grow lights to simulate outdoor conditions in low-light areas.
Ideal Light Levels
Achieving ideal light levels for your herbs means matching their specific needs to your environment, ensuring vibrant growth and preventing common issues like leggy stems or yellow leaves.
Different herbs have distinct requirements: basil and rosemary crave 6-8 hours of direct sunlight for robust flavor, while mint and chives prefer 4-6 hours in bright, indirect light to avoid scorching.
You assess your space by noting window directions—south-facing for intense light, east or west for moderate exposure.
Use a light meter or observe leaf color; deep green indicates success, signaling your herbs are thriving optimally.
Adjusting Light Exposure
Once you’ve assessed your herbs’ light needs, it’s time to tweak your setup for better results. You’ll avoid common pitfalls by making targeted adjustments that match each herb’s requirements, whether it’s basil craving full sun or mint preferring partial shade.
To optimize your herbs’ light exposure effectively:
-
Relocate plants: Move herbs to spots with the right light—south-facing windows for bright light or shaded areas to prevent scorching.
-
Use shades or filters: Install sheer curtains or reflective screens to diffuse intense sunlight, protecting delicate leaves from burns.
-
Supplement with grow lights: Add LED lights for low-light spaces, positioning them 6-12 inches above herbs and running them for 12-14 hours daily to mimic natural conditions.
Selecting Proper Soil and Containers
When you’re growing herbs, choosing the right soil and containers can make all the difference in preventing root issues that lead to plant failure.
Opt for well-draining potting mix, like one with perlite or vermiculite, to avoid waterlogged roots—aim for a pH between 6 and 7 for most herbs. To further improve soil quality, consider universal soil prep methods that adapt to various environmental conditions.
Don’t use garden soil, as it compacts and harbors problems.
For containers, select ones with drainage holes to let excess water escape; terracotta breathes better than plastic, reducing rot risk.
Size matters too—pick pots at least 6 inches deep to accommodate root growth, ensuring herbs thrive without crowding.
To enhance your herb’s success, consider alternatives to store-bought soil mixes that can offer better customization and results.
Identifying and Managing Pests
Pests often sabotage your herb garden before you notice, so spotting them early is key to keeping plants healthy. Look for signs like distorted leaves, sticky residue, or fine webs from common invaders such as aphids and spider mites. Additionally, incorporating natural herbs into your pest management can provide an effective and eco-friendly deterrent.
Early action prevents widespread damage and keeps your herbs thriving. Here’s how to identify and manage pests effectively:
-
Inspect regularly: Check leaves and stems weekly for pests, eggs, or damage to catch issues early.
-
Identify accurately: Use a magnifying glass and online guides to pinpoint the pest species for targeted control.
-
Treat promptly: Apply natural solutions like neem oil or introduce beneficial insects to eliminate pests without harming your plants.
For additional options in pest management, consider using natural pest sprays made from organic ingredients to maintain a healthy garden.
Personal Changes That Made a Difference
Several personal changes turned the tide for my herb garden, helping you keep plants alive and thriving.
First, I adjusted my watering habits, checking soil moisture daily instead of guessing, so you avoid overwatering mishaps.
Next, I selected pots with proper drainage, preventing root rot that once killed my basil.
I also positioned herbs near a south-facing window for consistent sunlight, boosting growth without burns.
Finally, I began rotating plants weekly for even exposure, ensuring robust health.
These tweaks transformed my space, empowering you to nurture vibrant herbs effortlessly.
This approach aligns with the principles of effortless herb gardening, making it simple for anyone to achieve fresh flavors at home.
Furthermore, I incorporated low-maintenance herbs into my garden to ensure they flourished with minimal care.
Tips for Sustaining Herb Growth
Sustaining your herb garden’s growth builds on the changes we’ve covered, so let’s focus on practical strategies that keep plants vigorous over time.
You’ll need to prioritize ongoing care to avoid common pitfalls and ensure lasting health.
-
Water wisely: Test soil moisture daily and water deeply but infrequently—aim for even saturation without sogginess, using well-draining pots to prevent root issues.
-
Prune regularly: Snip back herbs every few weeks to stimulate bushier growth; remove dead or yellowing leaves to reduce disease risk and promote airflow.
-
Monitor pests: Inspect plants weekly for signs like spots or insects, then apply natural treatments such as neem oil promptly to maintain vitality.
These steps help your herbs thrive year-round.
