The Ultimate Beginner’s Checklist Before Planting
Before you dive into planting, evaluate your garden space for size, sunlight, and wind patterns to ensure it’s ideal. Test your soil’s pH, nutrients, and drainage, then amend it with organic materials. Choose plants suited to your local climate and USDA hardiness zone for easy success. Gather essential tools like a trowel and shears, and plan a watering strategy based on plant needs. Identify potential pests and time your planting with frost dates, while setting a realistic budget. Master these steps, and you’ll unlock further strategies for a thriving garden.
Key Takeaways
- Assess your garden space for size, sunlight, wind patterns, and drainage to ensure optimal conditions.
- Test soil pH, nutrients, and texture, then amend it to create a healthy foundation for plants.
- Select plants that match your local climate, USDA hardiness zone, and soil conditions for better success.
- Gather essential tools like trowels and gloves, and develop a watering strategy based on plant needs.
- Evaluate water requirements, identify potential pests, and time planting according to frost dates and seasons.
Evaluate Your Garden Space
Before you start planting, evaluate your garden space to ensure your efforts pay off.
Start by creating a garden prep list to systematically assess key factors. Measure your area’s size and layout to match plant needs. Observe sunlight exposure, noting hours of direct light for optimal growth.
Check for wind patterns that might affect stability. Evaluate drainage to avoid pooling water, and identify obstacles like structures or overhanging branches. Furthermore, perform a basic soil analysis to understand its structure and nutrients, which supports effective preparation for plant health.
This list guides your decisions, preventing wasted time and resources, so you plant with confidence and success.
Additionally, incorporate soil preparation into your garden prep list to ensure the soil is properly conditioned for healthy plant growth.
Test Soil Quality
Once you’ve evaluated your garden space, you’ll need to test your soil quality to ensure it supports healthy plant growth. Testing reveals pH levels, nutrient content, and texture, which directly impact plant health. Collect samples from various spots, then use a home test kit or send them to a lab for precise results. This step prevents issues like poor drainage or nutrient deficiencies.
To visualize key soil tests:
| Test Type | What It Reveals |
|---|---|
| pH Level | Acidity or alkalinity |
| Nutrient Levels | Nitrogen, phosphorus, potassium |
| Soil Texture | Sand, silt, clay composition |
Act on these findings to amend your soil effectively. Additionally, soil testing plays a key role in identifying issues that may cause a garden to fail, allowing for targeted remedies.
By conducting soil tests, you can increase crop yields and promote overall garden success.
Select the Right Plants
Now that you’ve tested your soil, it’s time to select the right plants for your garden.
You choose varieties that suit your local climate to avoid struggles with extreme weather.
Then, you match them to your soil’s conditions for optimal growth and health.
For beginners, opting for low-effort plants can ensure a more successful and enjoyable gardening experience.
Additionally, exploring low-maintenance vegetables like radishes and lettuce can provide a straightforward introduction to gardening success.
Select by Climate
When selecting plants for your garden, you’ll need to match them to your local climate to ensure they thrive. Start by determining your USDA hardiness zone, which reflects average annual minimum temperatures, so you choose plants that won’t succumb to frost.
Assess rainfall patterns; select drought-resistant varieties for dry areas or those that tolerate excess moisture in humid regions. Consider seasonal temperature swings and sunlight hours to avoid issues like heat stress or poor growth.
Match to Soil
After selecting plants based on your climate, you’ll next match them to your soil type for optimal growth.
Different soils—sandy, clay, loamy, acidic, or alkaline—affect nutrient availability and drainage, so test yours with a simple kit to identify its pH and texture.
Choose plants suited to these conditions; for example, succulents thrive in well-drained sandy soil, while hydrangeas prefer acidic, moist types.
If mismatches occur, amend by adding compost, lime, or sulfur to improve structure and fertility.
This step ensures robust roots, minimizes diseases, and maximizes yields—always prioritize compatibility for long-term success.
Gather Essential Tools
Before you move on from selecting the right plants, you’ll want to gather your essential tools to make planting smooth and efficient.
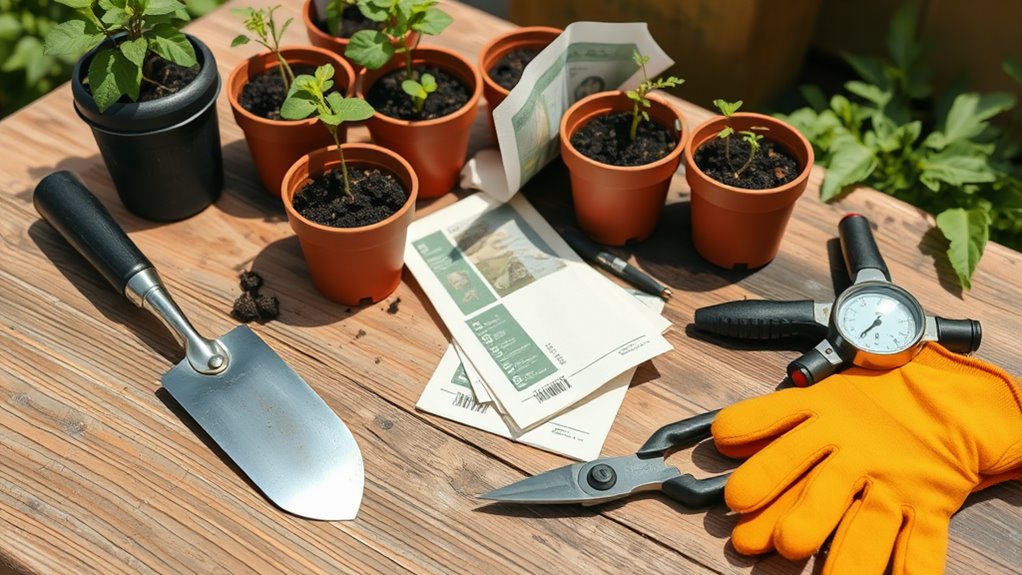
Start with a simple tool checklist that includes items like a trowel, gloves, and pruning shears.
This preparation ensures you’re fully equipped for success in your gardening adventure.
For instance, incorporating the three essential tools can greatly enhance your gardening experience.
To enhance your setup, also explore the top five must-have tools that seasoned gardeners rely on for optimal results.
Essential Tools
Essential tools form the backbone of your planting success, so gather a few key items to tackle tasks efficiently.
You’ll need reliable equipment to make digging, weeding, and watering straightforward and effective, reducing physical strain and boosting your productivity.
As a beginner, invest in durable, multi-purpose tools that fit your garden’s scale—think about quality over quantity to avoid frustration.
Proper tools enhance precision, helping you achieve healthier plants and a neater space.
Don’t overlook maintenance; keep them clean and sharp for longevity.
Tool Checklist
To build your tool checklist, start by rounding up a few reliable essentials that make planting straightforward and effective.
You’ll need a sturdy hand trowel for digging precise holes, durable garden gloves to protect your hands from thorns and soil, and a reliable watering can for even hydration.
Don’t overlook a sharp pair of pruners for trimming roots or stems, plus a garden fork to loosen soil efficiently.
Invest in a measuring tape to ensure proper spacing, and keep a notebook handy for tracking your progress.
These tools ensure you’re prepared and efficient from the start.
Understand Local Climate
As you prepare to plant, understanding your local climate sets the foundation for a thriving garden.
You’ll need to research your USDA hardiness zone to match plants with your area’s average low temperatures. Check historical weather data for rainfall patterns, frost dates, and seasonal shifts, which directly influence plant survival.
Observe your yard’s microclimate—sunny spots versus shaded areas—to avoid surprises. By selecting climate-appropriate species, you prevent common pitfalls like wilting or disease.
Prepare the Soil Properly
With your local climate in mind, you’ll want to start by testing your soil’s pH and nutrient levels to ensure it supports healthy growth. Additionally, consider exploring alternative options to store-bought soil mixes for potentially superior gardening outcomes.
Based on results, amend your soil to create an optimal environment for plants. Here’s how to proceed effectively:
-
Adjust pH levels: Use lime for acidic soil or sulfur for alkaline, targeting the ideal range for your crops.
-
Add organic matter: Mix in compost or well-rotted manure to boost nutrients and improve texture.
-
Aerate the soil: Loosen compacted areas with a fork or tiller to enhance root penetration.
-
Control weeds and pests: Manually remove invasive plants early to prevent competition for resources.
To further enrich your soil at no cost, incorporate backyard solutions like leaves or grass clippings for additional organic material.
This preparation sets a strong foundation for thriving gardens. (127 words)
Plan Your Watering Strategy
Before you plant, you’ll want to assess your plants’ water needs based on their type, soil, and local climate to avoid over- or under-watering. Understanding expert techniques is essential to refine this process and minimize common errors.
Next, schedule your watering times around the day’s weather and your routine for optimal absorption and efficiency.
This approach ensures your garden stays healthy and sustainable right from the start.
Additionally, incorporating watering timing strategies can help maximize plant growth while reducing water waste.
Assess Water Needs
How do you assess your plant’s water needs? It’s essential to evaluate factors that influence hydration without overdoing it.
Start by examining your plant’s specific requirements for healthy growth.
-
Identify plant type****: Research your species’ native environment to gauge its thirst level, like cacti needing less than ferns.
-
Check soil moisture: Insert your finger into the soil; if the top inch feels dry, it’s time to water.
-
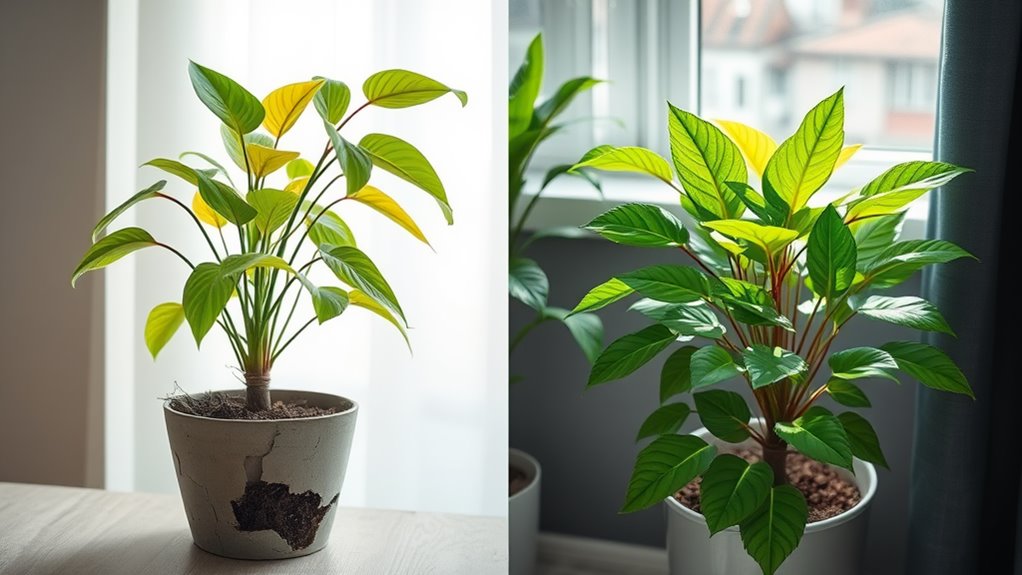
Observe plant signals: Watch for wilting, yellowing leaves, or brittle stems as indicators of water stress.
-
Consider environmental factors: Account for sunlight, temperature, and humidity, which affect evaporation rates.
Schedule Watering Times
Once you’ve assessed your plant’s water needs, you’ll create a tailored watering schedule to promote healthy growth and prevent issues like root rot.
Start by factoring in climate, soil type, and plant species; for instance, water deeply but infrequently to build strong roots.
Choose morning sessions to minimize evaporation and disease risk. Use apps or timers for reminders, and always check soil moisture first—aim for the top inch to be dry.
Adjust seasonally: increase frequency in summer, reduce in winter.
This disciplined strategy ensures efficient water use and vibrant, resilient plants.
Identify Potential Pests
Before planting, various pests can threaten your garden’s success, so you’ll want to assess potential risks early. Identifying pests helps you prevent damage and protect your plants from the start. Focus on common threats like insects, diseases, and weeds that could invade your soil.
-
Research local pests: Check online resources or extension services to learn about prevalent pests in your region.
-
Inspect your site: Examine soil, nearby plants, and tools for signs like eggs, larvae, or damage.
-
Identify symptoms: Familiarize yourself with pest indicators, such as holes in leaves or wilting.
-
Plan preventive measures****: Note potential hotspots and prepare for monitoring to keep your garden healthy.
Determine Optimal Planting Timing
Timing plays a crucial role in your garden’s success, so you’ll need to identify the ideal planting window based on local weather patterns and plant requirements.
Research your area’s first and last frost dates using reliable sources like USDA zones or local extensions. Match plants to seasons—cool-weather crops like lettuce thrive in spring, while tomatoes need warmer soil.
Observe soil temperatures; aim for at least 50°F (10°C) for most vegetables. Test microclimates in your yard, as sunny spots warm up faster.
This precision prevents stunted growth and maximizes yields, setting you up for a thriving garden.
Set a Realistic Budget
One key step in your gardening journey is to set a realistic budget right from the start. This prevents financial surprises and keeps your project manageable. By planning ahead, you’ll focus on what’s essential without unnecessary extras.
-
List your must-haves: Jot down costs for seeds, tools, and soil to build a solid foundation.
-
Factor in variables: Include potential extras like fertilizers or pest control for accuracy.
-
Set spending limits: Allocate funds per category to avoid overspending and stay disciplined.
-
Track progress: Regularly review your budget to adjust as needed and ensure you’re on track.
This approach makes your gardening efficient and stress-free.
