Save Your Failing Garden With This One Soil Test
If your garden’s plants are stunted, yellowing, or yielding poorly, it’s time for a simple soil test—your key to diagnosing nutrient shortages and pH imbalances. You’ll gather samples from various spots using clean tools, then check for essential nutrients like nitrogen, phosphorus, and potassium, plus pH levels that affect uptake. Once you interpret results, add amendments like lime for acidic soil to fix issues fast. Master these steps and discover even more ways to nurture thriving beds.
Key Takeaways
- Perform a soil test to identify nutrient deficiencies and pH imbalances causing garden failure.
- Collect soil samples from multiple garden areas using clean tools for accurate results.
- Interpret test results to assess pH levels and key nutrients like nitrogen, phosphorus, and potassium.
- Apply targeted amendments, such as lime for low pH or fertilizers for nutrient shortages, based on test findings.
- Re-test soil every six months and add organic matter like compost to sustain garden health.
Signs of a Failing Garden
If your garden’s struggling, you’ll spot key signs like stunted growth, yellowing leaves, or poor yields, which often signal nutrient deficiencies or imbalanced soil that demand immediate attention.
You might also notice wilting plants, brittle stems, or sparse blooms, all pointing to underlying soil issues.
To address this, start with soil testing using a reliable kit; it reveals pH levels and nutrient shortages accurately.
Act promptly by observing these details—dig a sample, check for compaction, and note any unusual odors or textures.
This practical step empowers you to diagnose and correct problems before they worsen.
Moreover, soil testing can increase crop yields by optimizing nutrient balance for better plant performance.
By performing soil testing, you can identify and remedy issues through practical steps for conducting and interpreting results.
Why Soil Testing Is Essential
You need to test your soil to detect nutrient shortages that could stunt your plants’ growth and yield.
It’s also vital for assessing soil pH, as imbalances can hinder nutrient uptake and lead to poor health. Furthermore, regular soil testing allows gardeners to decode soil signs for improved plant vitality.
Additionally, soil testing is essential for applying universal soil prep methods that work across various environmental conditions.
Detect Nutrient Shortages
Detecting nutrient shortages in your garden’s soil is crucial, as these imbalances can stunt plant growth and reduce yields before symptoms even appear.
You’ll spot deficiencies in essential nutrients like nitrogen, phosphorus, or potassium through a simple soil test, which analyzes levels accurately. For example, if nitrogen is low, your plants might show yellowing leaves, but testing quantifies the shortfall, allowing targeted amendments.
Actively monitor your soil biannually; this proactive approach prevents issues like stunted roots or poor flowering. By addressing shortages early, you’re optimizing nutrient uptake and ensuring vibrant, productive plants without guesswork.
Assess Soil Ph
Assessing soil pH ranks among the most critical steps in garden maintenance, as it directly influences nutrient absorption and plant vitality.
You can’t overlook how pH levels determine which nutrients your plants access; for instance, acidic soil might lock up essential elements like phosphorus, while alkaline conditions hinder iron uptake.
By testing regularly, you’ll identify imbalances that stunt growth, ensuring your garden thrives.
Remember, different plants thrive in specific pH ranges—say, 6.0 to 7.0 for most vegetables—so you’re tailoring care to boost yields and health effectively.
Act now to reveal your soil’s secrets.
Prevent Plant Issues
Preventing plant issues starts with soil testing, which uncovers hidden imbalances that could harm your garden.
You’ll identify nutrient deficiencies, like low nitrogen or potassium, that stunt growth or cause yellowing leaves.
Act on results by amending soil—add lime for acidic conditions or organic matter for poor drainage—to foster healthy roots and ward off diseases.
Regularly test to catch problems early, saving time and resources.
For instance, if pH is off, adjust it precisely to match your plants’ needs, ensuring vibrant blooms and bountiful harvests without guesswork.
Stay proactive; your garden thrives on informed care.
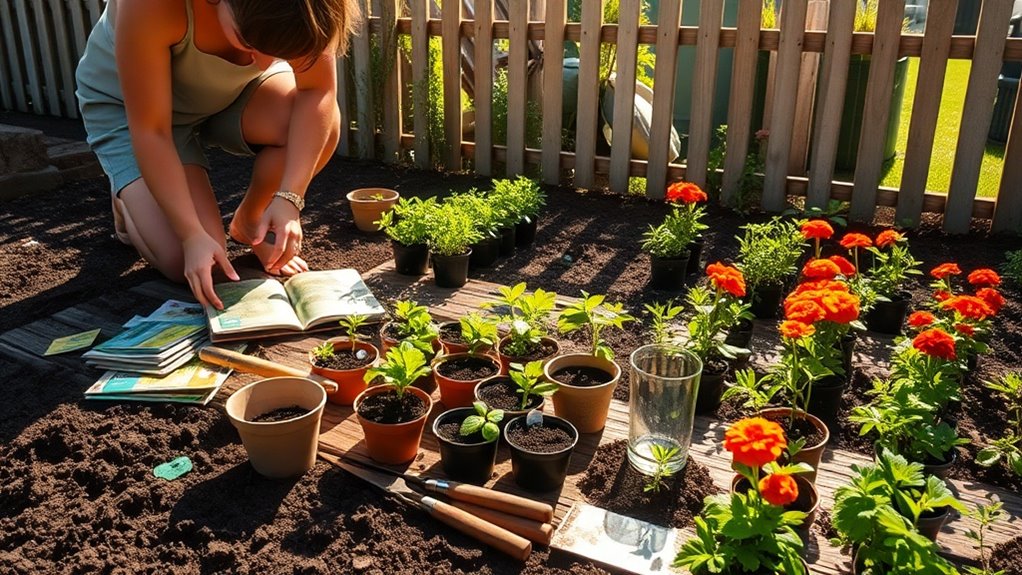
Gathering the Right Soil Samples
To get accurate soil test results, you’ll start by selecting the right sample sites in your garden, focusing on areas that represent varied conditions like sunny spots and shaded beds.
Next, choose sites that avoid contaminants, such as near structures or treated areas, to maintain sample integrity.
Finally, use appropriate sampling tools like a clean trowel or probe to collect soil at the proper depth, ensuring you gather enough for reliable analysis. This soil testing can also help you determine if store-bought mixes are suitable for your garden’s specific needs.
Additionally, understanding common myths about soil can help ensure your sampling leads to more informed gardening decisions.
[LIST OF 3 SUBHEADING DISCUSSION POINTS IN ENGLISH
Gathering the right soil samples sets the foundation for an accurate garden soil test, so you’ll want to approach this step with care.
Start by using the proper tools and techniques to ensure samples represent your garden’s conditions accurately.
-
Choose the right tools: Grab a clean soil probe or trowel to avoid contamination; sterilize it first for reliable results.
-
Determine sample depth****: Dig to 6-8 inches to capture root zone nutrients, mixing layers thoroughly.
-
Collect adequate volume****: Gather at least a cup per sample, avoiding rocks or debris for precise lab analysis.
-
Label and store properly: Use sealed bags with clear labels, keeping samples cool and dry until testing.
Select Sample Sites
Once you’ve collected your soil samples with the right tools, turn your attention to choosing sites that accurately represent your garden’s variations.
Begin by assessing your garden’s layout, noting differences in sunlight, moisture, and topography to identify key zones. For instance, select sites from sunny vegetable beds, shaded flower areas, and low-lying spots prone to waterlogging.
This approach ensures you’re capturing a true cross-section of conditions. Avoid biased locations like near walkways or compost piles, which could skew results.
Use Sampling Tools
Equipping yourself with the right tools ensures accurate and efficient soil sampling, so let’s dive into the essentials.
You’ll gather reliable samples by choosing tools that prevent contamination and handle various soil types effectively.
-
Soil probe or auger: Use this for deep, undisturbed cores; it minimizes soil disruption and provides consistent samples up to 12 inches.
-
Hand trowel: Ideal for surface sampling in tight spaces; scrape away debris then dig to the desired depth for precise collection.
-
Clean brushes and bags: Brush tools between sites to avoid cross-contamination, and use labeled bags to seal samples immediately.
-
Measuring tape: Measure sampling depth accurately to ensure uniformity, helping you compare results across your garden.
With these, you’re set for precise testing.
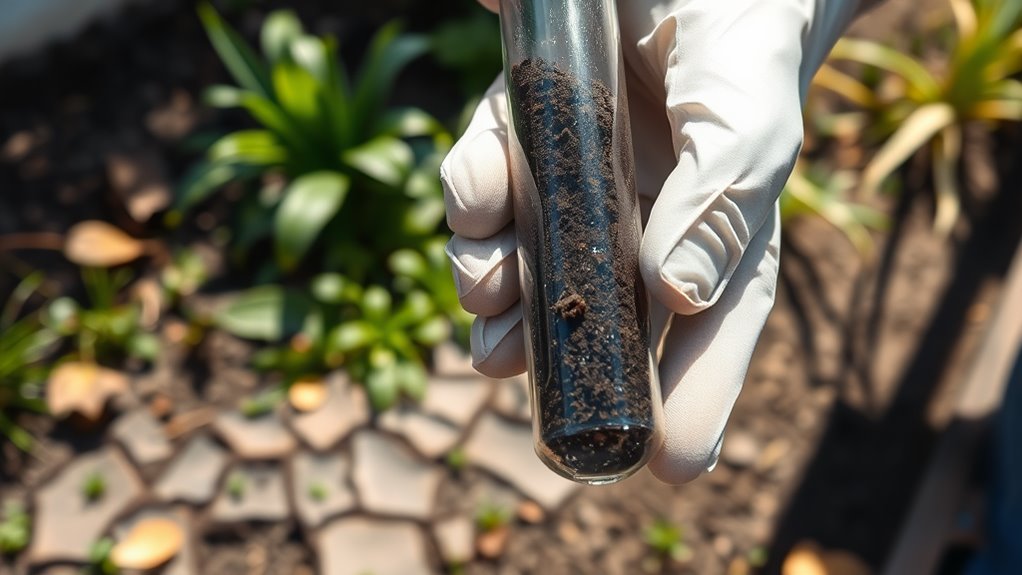
Conducting the Soil Test at Home
With a few key tools, you’ll quickly conduct a soil test at home to gauge your garden’s nutrient levels and pH.
Begin by assembling a reliable soil test kit, distilled water, a clean trowel, and mixing containers. Select several spots across your garden, digging samples 6-8 inches deep to capture root-zone soil. Avoid areas near recent amendments or waste.
Thoroughly mix the samples in a bucket to homogenize them, removing debris. Moisten with distilled water per kit instructions, then add reagents or insert pH probes as directed. Stir gently and allow the mixture to react fully before noting observations.
Interpreting Your Soil Test Results
After you’ve completed your soil test, examine the results to pinpoint your garden’s pH and nutrient levels. Look for the pH value first; it ranges from 0 to 14, with 7 being neutral. Acidic soils (below 7) may hinder nutrient uptake, while alkaline ones (above 7) could limit micronutrients. Nutrient reports detail key elements like nitrogen (N), phosphorus (P), and potassium (K) to reveal deficiencies or excesses. To further enrich your soil naturally, consider adding kitchen scraps from your kitchen waste to create nutrient-rich compost.
-
Assess pH Levels: Compare your reading to plant-specific ranges; most thrive between 6.0 and 7.5.
-
Evaluate Nitrogen (N): Check if levels are adequate; low N signals poor growth, high N risks imbalance.
-
Analyze Phosphorus (P): Determine if P is sufficient for root and flower development.
-
Review Potassium (K): Ensure K supports disease resistance and overall plant vigor.
For a more eco-friendly approach to correcting these issues, try incorporating sustainable fertilizing techniques like homemade compost to enhance soil health naturally.
Fixing Common Soil Issues
Once you’ve pinpointed issues from your soil test, you’ll need to address them head-on to optimize your garden’s health. Start by tackling pH imbalances—add lime for acidic soil or sulfur for alkaline. Nutrient deficiencies demand targeted amendments: apply compost for organic matter or specific fertilizers for nitrogen, phosphorus, and potassium shortages. Combat compaction by aerating and improving drainage with organic mulches. To further boost your harvest naturally, incorporate natural soil preparation techniques that enhance plant health and yield without synthetic fertilizers. For even better results in enriching your soil, try simple ingredient swaps in your composting process to promote efficient decomposition and produce higher-quality organic matter.
| Common Issue | Quick Fix | Practical Tip |
|---|---|---|
| Low pH | Add lime | Test again after 4-6 weeks |
| High pH | Apply sulfur | Mix into topsoil evenly |
| Nutrient Lack | Use balanced fertilizer | Monitor plant response weekly |
| Poor Drainage | Incorporate sand | Avoid overwatering |
Maintaining a Healthy Garden Soil
Maintaining healthy garden soil requires consistent effort, so you’ll regularly monitor and nurture it to support thriving plants. Learning from soil prep mistakes is essential for long-term success.
Conduct soil tests every six months to evaluate pH, nutrients, and texture, using results to add targeted amendments like compost for fertility or lime for pH balance. This proactive strategy prevents degradation and sustains productivity over time.
Furthermore, enhance your soil naturally by utilizing backyard materials such as composted leaves and kitchen scraps to improve quality without additional costs.
- Test soil biannually to detect imbalances early.
- Add organic matter, such as compost, to enhance structure and nutrients.
- Manage watering and drainage to avoid compaction and erosion.
- Rotate crops and use cover crops to promote microbial activity and reduce pests.