The Easy Way to Make Flower Beds That Look Like a Pro Did Them
You’ll create pro-looking flower beds effortlessly by selecting plants that match your soil, climate, and sunlight, then designing a layered layout with height variations for depth. Prepare the soil with compost, space plants properly, and water deeply using a soaker hose. Maintain them through regular pruning, mulching, and natural pest control for a neat, vibrant display. Follow these steps for impressive results; explore more strategies to refine your garden’s allure.
Key Takeaways
- Sketch a balanced layout with plants layered by height for depth and visual appeal.
- Test and amend soil with compost to ensure it meets plant needs for optimal growth.
- Select and arrange plants based on sunlight, water requirements, and complementary colors.
- Water deeply at the root zone and apply mulch to retain moisture and control weeds.
- Prune faded flowers regularly and monitor for pests to keep beds looking professional.
Selecting the Right Plants
When designing your flower bed, you’ll need to select plants that match your local conditions for optimal growth.
In flower bed design, start by assessing your soil type—whether it’s clay, sandy, or loamy—and choose plants that thrive in it, like drought-resistant succulents for dry soils. For particularly poor soil conditions, consider resilient flowers that can flourish with minimal soil amendments.
Consider your climate zone to pick hardy perennials or annuals that withstand frost or heat.
Evaluate sunlight exposure; full-sun flowers such as marigolds suit bright spots, while shade-loving ferns work for dim areas.
Always check water needs to avoid over- or under-watering, ensuring a vibrant, low-maintenance display.
To achieve a professional appearance, incorporate layout strategies into your design for an organized and visually appealing arrangement.
Designing an Effective Layout
Designing an effective layout transforms your flower bed from a simple planting area into a visually striking feature. By incorporating techniques for year-round blooms, you can maintain a lively garden all year long.
You’ll create harmony by thoughtfully arranging plants to enhance your garden’s appeal, drawing the eye with balanced forms and dynamic compositions.
-
Sketch your design first: Map out the bed’s shape and dimensions on paper, ensuring it complements your yard’s architecture for a professional look.
-
Layer plants strategically: Place taller varieties at the back or center, medium heights in the middle, and low-growers at the front to add depth and prevent overcrowding.
-
Incorporate focal points: Use contrasting colors, textures, or unique specimens to guide the viewer’s gaze, creating visual interest without overwhelming the space.
To elevate your flower bed design, incorporate plant recommendations that have successfully turned ordinary spaces into vibrant outdoor paradises.
Preparing the Soil for Success
You’ll need to test your soil’s pH first to determine if it’s ideal for your chosen flowers.
Then, add organic matter like compost to enrich the soil and boost its nutrient content.
This simple preparation ensures your flower bed thrives with minimal issues.
These universal methods can be adapted to various environmental conditions, working regardless of location.
To further enhance your garden’s health, consider soil testing to identify and remedy potential issues.
Test Soil Ph
Testing your soil’s pH is a crucial first step in preparing your flower bed, as it reveals whether the ground is acidic, neutral, or alkaline—all of which directly affect plant health and growth.
This simple test empowers you to match plants with suitable conditions, boosting vitality and yield.
-
Choose a testing method****: Buy a home pH kit or send samples to a lab for precise readings, ensuring quick, reliable results.
-
Sample correctly: Dig soil from several spots at 4-6 inches deep, mix thoroughly, and avoid contaminated areas for accurate representation.
-
Interpret results: Compare pH values (e.g., 6.0-7.0 for most flowers) to plant needs, helping you select thriving species without guesswork.
Add Organic Matter
Once you’ve determined your soil’s pH, you enhance its quality by incorporating organic matter, which boosts nutrient levels, improves drainage, and fosters a healthier environment for your flowers to thrive.
Choose compost, well-rotted manure, or leaf mold for best results; aim for a 2-4 inch layer spread evenly over your bed. Use a garden fork to mix it into the top 6-8 inches of soil, breaking up clumps as you go.
This aerates the ground and encourages beneficial microbes, ensuring your plants establish strong roots quickly. Test again after amending to confirm improvements, then plant with confidence.
Planting Techniques to Use
Now that you’ve prepared your soil, turn your attention to key planting techniques like refining soil conditions and mastering plant spacing.
You’ll ensure healthier plants by adjusting soil as needed to match your flowers’ requirements.
Proper spacing lets you arrange plants efficiently, preventing overcrowding and boosting overall garden vitality. Additionally, by incorporating watering timing strategies, you can maximize plant growth while minimizing water usage.
To further promote plant health, incorporate effective watering techniques for optimal hydration and growth.
Soil Preparation
As you prepare the soil for your flower beds, assess its texture and pH first to ensure it supports healthy roots.
Once tested, amend the soil to create an optimal environment for your plants. You’ll need to incorporate organic matter for better drainage and nutrients, avoiding compaction that hinders growth.
-
Test soil accurately: Use a home kit or lab service to measure pH and nutrient levels, adjusting as needed with lime or sulfur.
-
Incorporate amendments: Mix in compost or aged manure to improve fertility and structure, aiming for a loamy consistency.
-
Till properly: Loosen the top 6-12 inches with a garden fork, removing weeds and rocks for even root penetration.
This practical approach ensures robust flower beds. (99 words)
Plant Spacing Techniques
After selecting your plants, you’ll find that proper spacing techniques maximize growth and airflow, preventing overcrowding that leads to disease.
To start, research each plant’s mature size and recommended distances from reliable sources or labels. For example, space perennials 12-18 inches apart, annuals 6-12 inches, and shrubs 2-3 feet, adjusting for bed size and climate.
Use a tape measure and grid layout to plot positions, ensuring even distribution for visual balance. This reduces competition for water and nutrients, eases maintenance like weeding, and promotes a professional, thriving garden appearance.
Regularly check and adjust as needed.
Arranging Plants for Visual Appeal
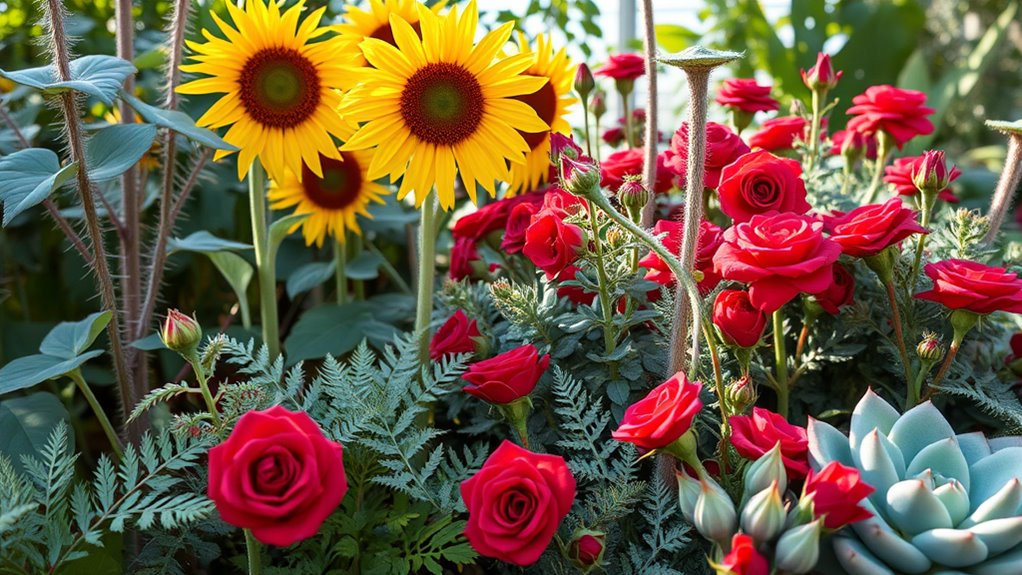
How do you create a visually appealing flower bed? Start by considering plant heights, colors, and textures to craft a balanced design that draws the eye.
You’ll want to layer plants for depth, ensuring taller ones anchor the back while shorter blooms frame the front.
-
Vary heights strategically: Place tall plants at the back or center to create focal points, allowing shorter varieties to fill in and add layers without overcrowding.
-
Incorporate color harmony****: Group complementary colors—like purples with yellows—to evoke mood and ensure the bed pops visually throughout the seasons.
-
Balance textures and forms: Mix fine foliage with bold leaves and rounded shapes with spiky ones for added interest and a professional, polished look.
Additionally, consider incorporating perfect plant pairs to boost the garden’s overall health and growth through mutually beneficial relationships.
To further enhance your garden’s vibrancy and ecological benefits, incorporate flowers that attract butterflies into your design for a lively, fluttering display.
Watering and Feeding Strategies
Watering and feeding your flower beds properly ensures plants stay healthy and vibrant.
You should water deeply once or twice a week, targeting the root zone to promote strong growth—use a soaker hose for efficiency and water early morning to cut evaporation.
Check soil moisture regularly; if it’s dry an inch down, it’s time to hydrate.
For feeding, apply a balanced, slow-release fertilizer at planting and every six weeks during peak growth.
Opt for organic options like compost tea to boost soil health without chemicals.
Always follow dosage guidelines to prevent nutrient overload, keeping roots thriving.
In extreme heat, implement heat-proof watering tips to help your garden thrive and keep plants hydrated. To maximize efficiency and save water, consider adopting a smart watering schedule that enhances overall garden productivity.
Maintaining Healthy Flower Beds
With your watering and feeding routines established, you focus on regular upkeep to keep flower beds thriving. This means pruning dead blooms, applying mulch, and monitoring soil conditions to promote vibrant growth and prevent issues.
-
Prune regularly: Remove faded flowers and overgrown stems to encourage bushier plants and extend blooming periods, maintaining a neat, professional appearance.
-
Mulch effectively: Spread a 2-3 inch layer of organic material around plants to retain moisture, regulate soil temperature, and enhance visual appeal without compacting the soil.
-
Monitor soil health: Test pH and nutrient levels every few months, then amend as needed to support strong root development and overall plant vitality.
Controlling Weeds and Pests
Even though you’ve established a solid maintenance routine, controlling weeds and pests remains essential to protect your flower beds’ health and appearance.
Start by applying a thick mulch layer to suppress weeds, blocking sunlight and reducing germination. Hand-pull persistent weeds to prevent root establishment.
For pests, inspect plants weekly for signs like chewed leaves or insects. Introduce natural predators, such as ladybugs for aphids, or use neem oil sprays.
If infestations escalate, apply targeted organic pesticides sparingly, following instructions precisely. This proactive strategy minimizes damage, keeps your beds thriving, and maintains a professional look without excess chemicals.